The Short Version
A flip is a sales job. Renovation dollars go where buyers look—kitchens, paint, floors—not always where the risk lives. A freshly flipped 1925 West Philadelphia rowhouse looked flawless. Our inspection still turned up:
- A bowing exterior wall and missing lintels, flagged for immediate action.
- Cracked and over-notched floor joists above the finished basement.
- Roofing cement used as flashing and crumbling chimney crowns.
- An uncapped gas line, no arc-fault protection, and an unverified ground.
- Moisture behind the finished walls, plus several safety concerns.
Newer finishes don’t mean fewer problems. They can hide them. So walk every flip like an inspector: facade, roof, basement bones, the “new” systems, and the pretty rooms.
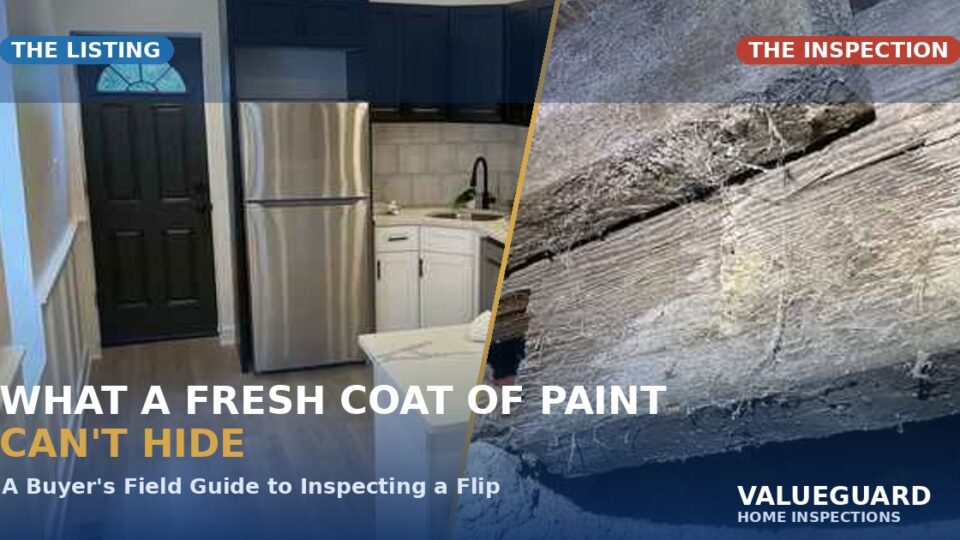
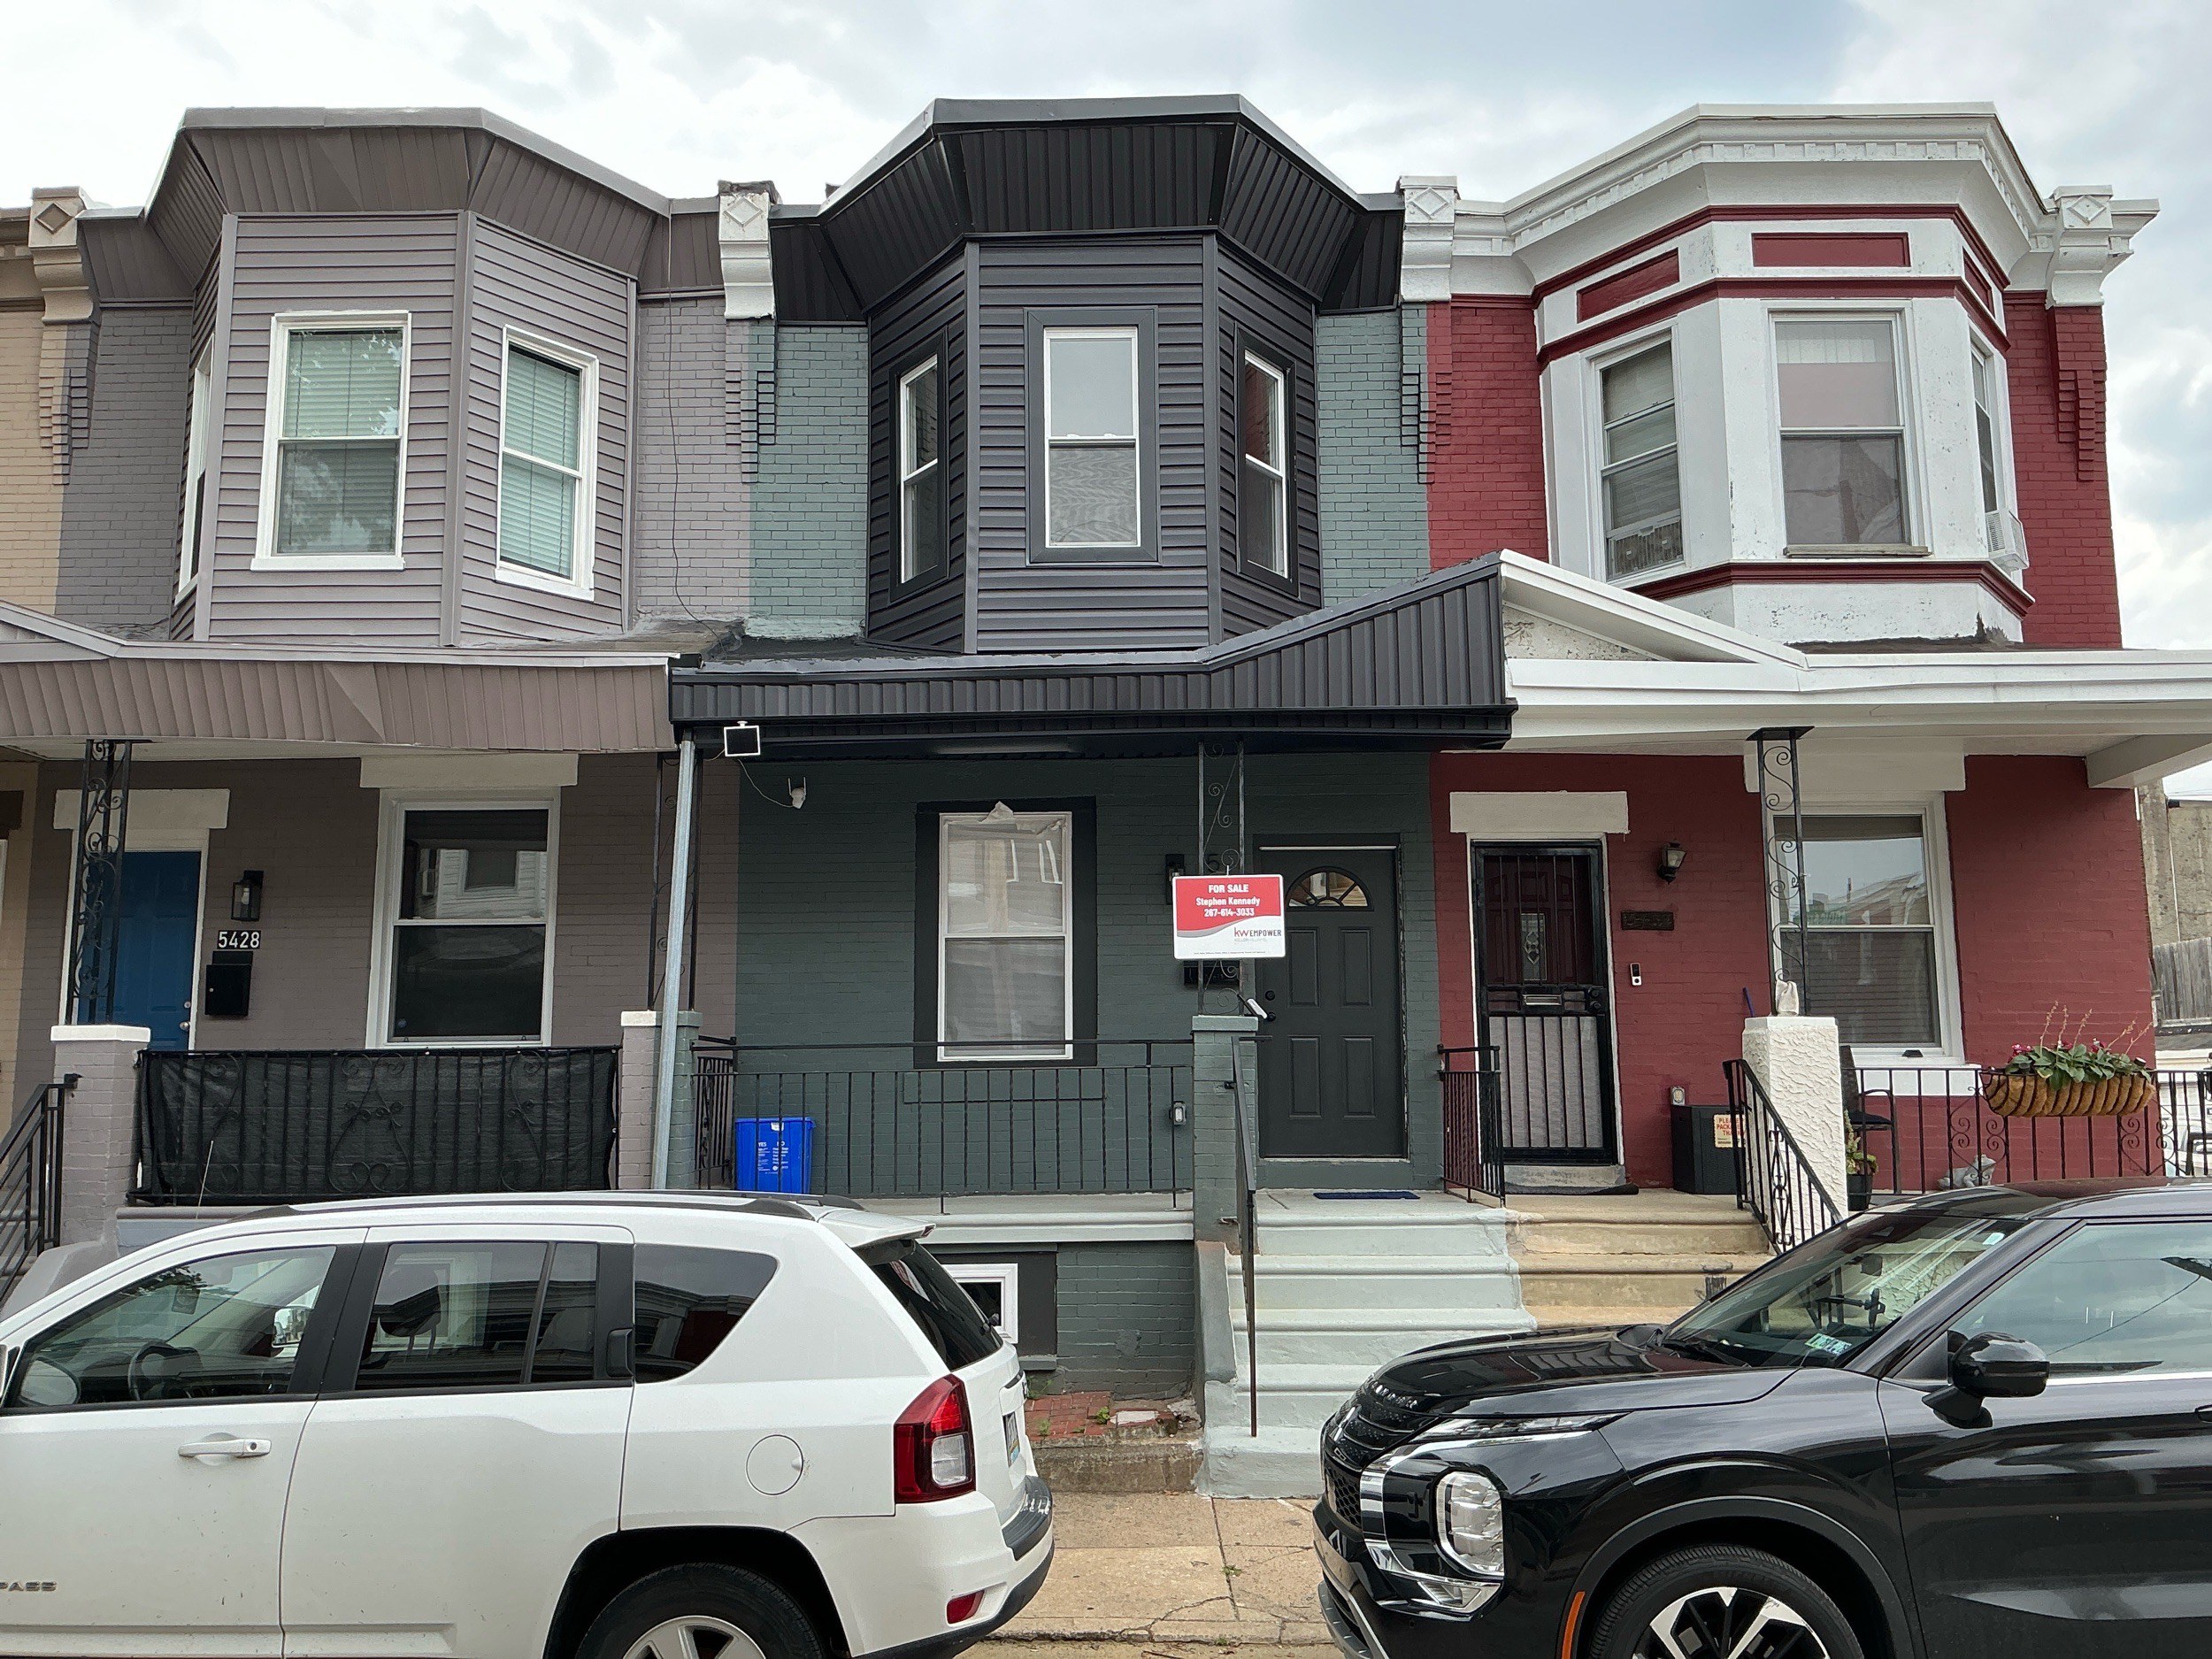
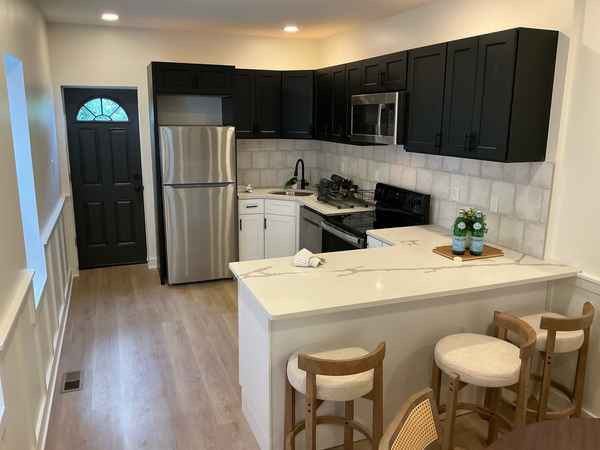
You step through the front door, and the house does its job: it makes you fall in love. The kitchen is bright and brand new. Shaker cabinets, quartz counters, stainless steel across the board. The floors are wide-plank and flawless. Recessed lights glow in a finished basement. Even the outside got the treatment—charcoal-painted brick, matte black doors, a new wood deck out back.
Everything says move-in ready. Nothing says slow down.
That gap is the whole point of this guide. It sits between what a flip is selling you and what’s actually underneath. And it’s exactly why a professional flip house inspection matters more on a renovated home, not less.
Think of a flip as a sales job. Investors spend their money where buyers look: countertops, cabinets, paint, and fixtures. They spend far less where buyers can’t easily see. That means the joists, the foundation, the gas line, the roof flashing, and the ground wire on that shiny new panel.
So this field guide is a real one. Every red flag below comes from a single inspection we performed this month. The home was a roughly 1,750-square-foot West Philadelphia rowhouse, built in 1925 and freshly flipped for sale. On paper, it looked perfect. In practice, our report ran to dozens of findings. Two were flagged for immediate action. Several were outright safety concerns. (We’ve kept the address and buyer private. The photos are ours from the inspection.)
Here’s how to walk a flip the way an inspector does.
Rule #1: The Prettier the Finishes, the Harder You Look
Start with a mindset, not a checklist. A cosmetic renovation is not a structural one. New paint, new floors, and new appliances tell you a house was updated. They say nothing about whether it was repaired.
In fact, fresh finishes can work against you. They cover the very evidence an inspector relies on.
Our report on this home said exactly that. The property had “undergone recent extensive renovations,” so “hidden damage/defects are possible.” It also warned that “recent painting may limit historical evidence of moisture intrusion.” In plain terms, the story of the house has been painted over. You need someone trained to read what’s left.
So when a house looks this good, don’t relax. Do the opposite. Every zone below is a place where this flip looked finished—and turned out not to be.
Zone 1: Start at the Sidewalk—Read the Facade
Before the interior charms you, cross the street and look at the walls.
On this home, the painted charcoal brick was doing double duty. It looked sharp. It also hid a masonry wall we flagged for immediate action. The wall showed clear bowing and movement, so we recommended a structural engineer evaluate it. That assessment alone runs an estimated $2,000–$2,500.
Nearby, one or more window lintels were missing. A lintel carries the wall’s weight above an opening. When it’s gone, the wall and structure can slowly fail. Repairs here were estimated at another $2,000–$2,500.
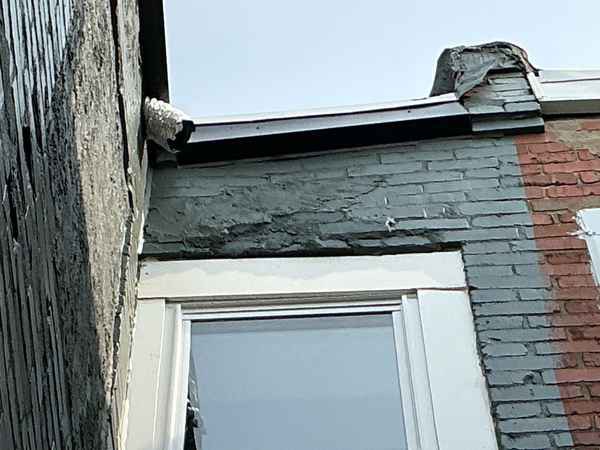
The paint itself is a clue. Our report noted the brick “appears to have been painted,” which “may compromise the breathability of the brick wall.” Painting brick can trap moisture inside century-old masonry. It also hides deteriorating mortar joints—like the ones we found, which needed $1,500–$2,000 in repointing.
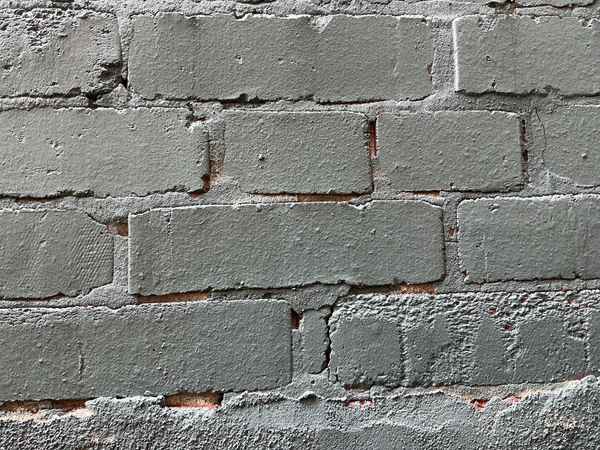
What to look for: Sight down the wall from the corner of the building. Watch for bulges, leans, or waves. Check above every window and door for a solid lintel. And treat freshly painted masonry as a question, not an answer.
Zone 2: Look Up—Roof and Chimney
Most Philadelphia rowhouses have low-slope or flat roofs. A flip will often advertise a “new roof,” and this one estimated the main roof at just 0–5 years old. But new-ish is not the same as done right.
Up top, we found roofing cement smeared in as flashing. As our report puts it, that “should be considered temporary at best.” It’s the roofing version of tape. It buys time, it doesn’t fix the problem, and it shows corners were cut. We also documented prior patch repairs. On top of that, the porch roof was already near the end of its life, at $1,000–$1,500 to replace.
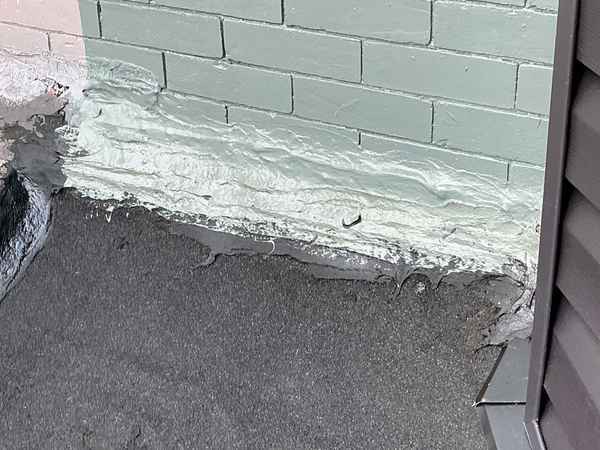
Then there are the chimneys. Both were abandoned, both had damaged crowns, and one was partly covered in asphalt sealer. An abandoned chimney isn’t automatically a crisis. But a crumbling crown lets water travel down into the house, and a ground-level paint job never touches it.
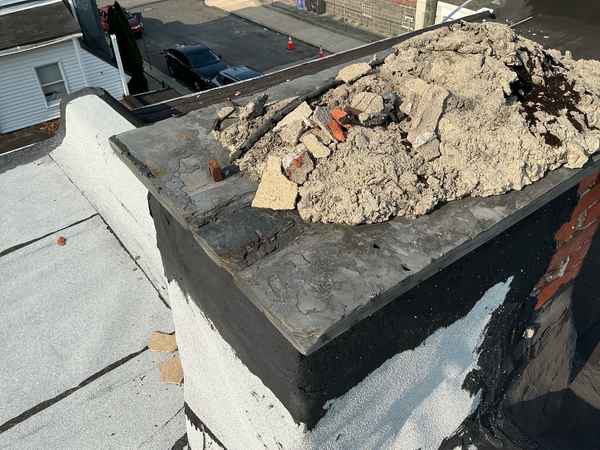
What to look for: Insist your inspector physically gets on the roof. A glance from a window or deck isn’t enough. Ask specifically about real flashing, not cement, and about the condition of any chimney crowns and caps.
Zone 3: Go to the Basement—Meet the Bones
This is where a flip earns your trust or loses it. It’s also the zone buyers skip most often, because it’s usually dark and unfinished. Here, though, it was finished and staged to look like a bonus living room.
Behind the recessed lights and new floors, the bones told a different story. We documented foundation mortar deterioration, a cracked floor joist, and a joist that had been over-notched. Each one risks structural movement and damage. These are the load-bearing parts of the house. No amount of luxury vinyl plank changes what’s happening above the ceiling.
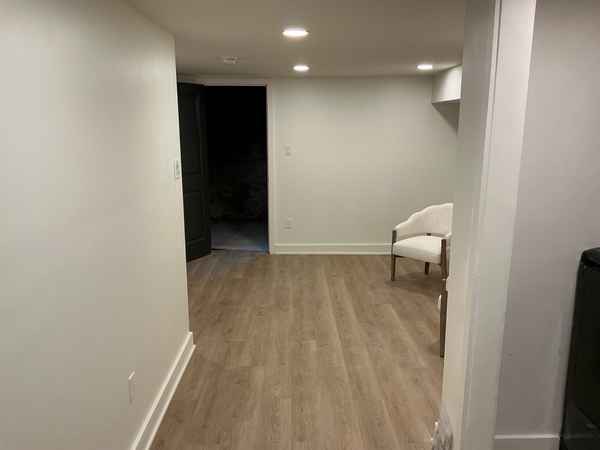
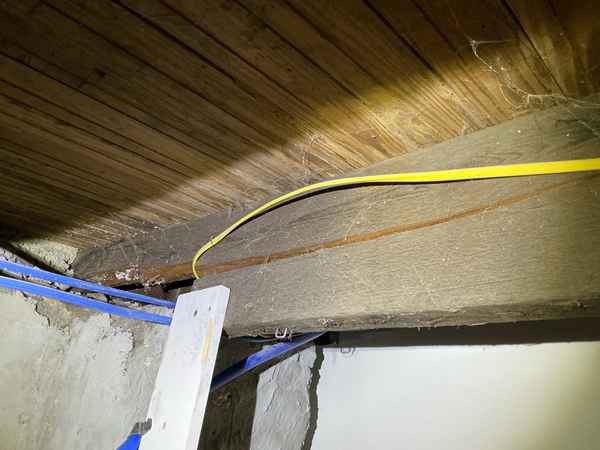
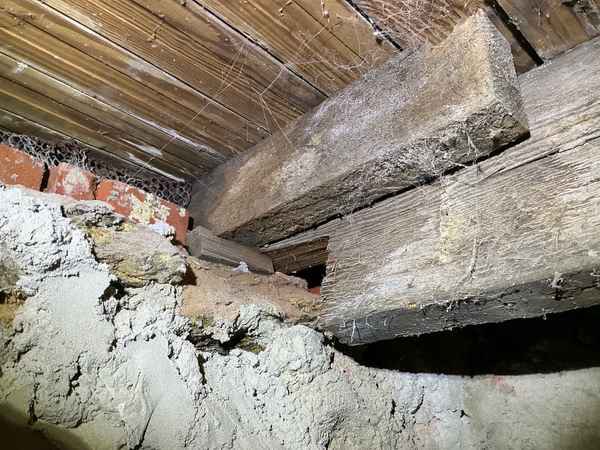
In the one unfinished corner we could still reach, the foundation showed efflorescence and moisture staining. That white, chalky residue proves water has been moving through the masonry. Our report recommended a dehumidification system. Notice the pattern: the moisture problem was real, but a finished basement hides it first.
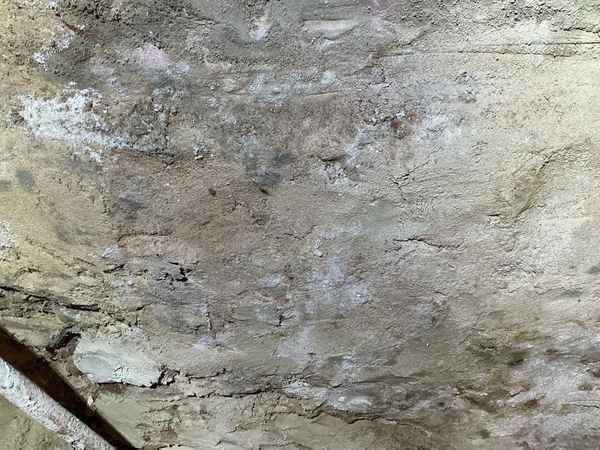
What to look for: In any flip with a finished basement, ask what’s behind the walls. Then ask whether the inspector could access the foundation and framing at all. A beautiful finished basement can be the most effective mask in the house.
Zone 4: The “New” Systems Aren’t Always Installed Right
Flippers love to advertise new mechanicals, and this house had them. A new water heater. A new heat pump and air handler. New appliances. New equipment is a real plus—when it’s installed correctly. Here, it often wasn’t.
The most serious issue sat in the basement: an uncapped gas pipe, which we flagged as a safety concern. An open gas line isn’t a someday problem. It’s a today problem.
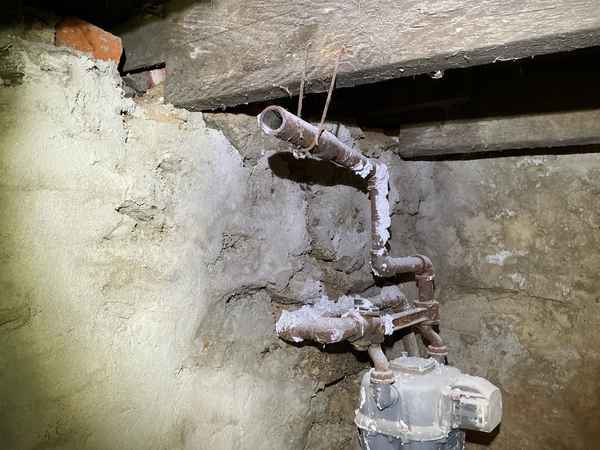
The electrical panel looked clean and modern. Behind the cover, though, we found no AFCI (arc-fault) protection, a key fire-safety feature. We also couldn’t verify the ground connection. Outside, the brand-new AC line set already had damaged insulation, and the condenser wasn’t set level. The new water heater showed evidence of leakage, with no drip pan beneath it.
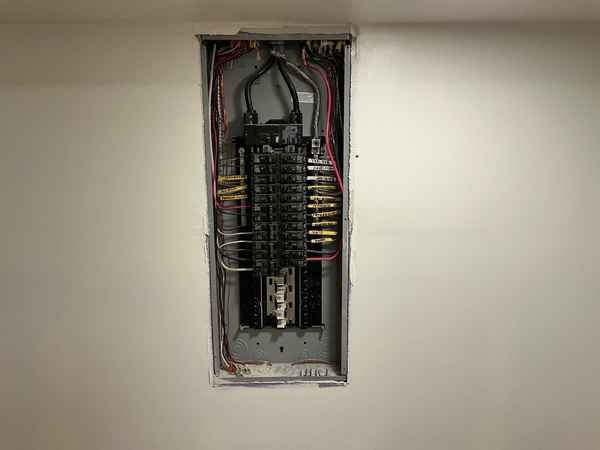
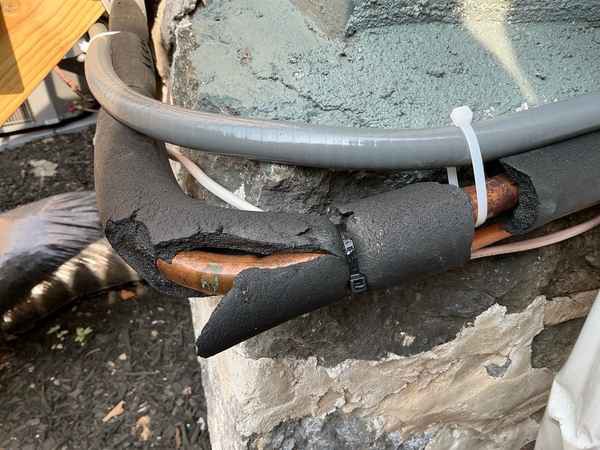
What to look for: “New” is a starting point, not a guarantee. Ask your inspector to open the panel. Check the water heater base for a pan and staining. Then look at the small connections—line sets, caps, and terminations—that a rushed installer skips.
Zone 5: Beautiful, but Not Always Safe
Some of the prettiest rooms carried the bluntest safety flags. In the gleaming kitchen, the range had no anti-tip bracket. That’s a real tip-over hazard, especially for kids, and a safety concern in our report.
The laundry told a similar story. The new washer and dryer sat flush against the walls, with no room for a drip pan. We flagged that for immediate action. The dryer also gave off a burning odor when we ran it—another safety concern.
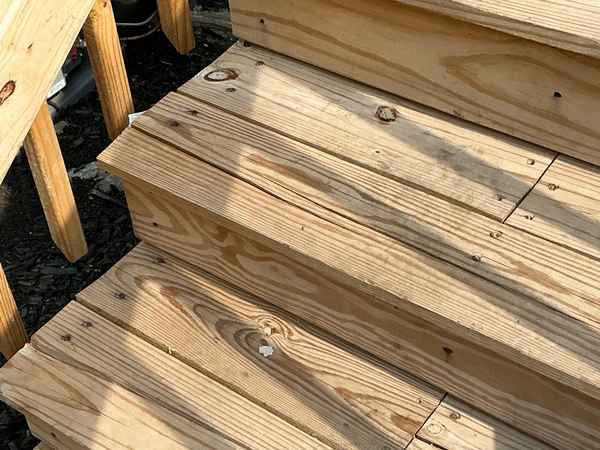
Even the brand-new back stairs came back with problems. One section was in poor overall condition and unsafe to use. The lesson repeats: newness is not the same as safety. The newest features still deserve scrutiny.
The Tell: Add It All Up
On their own, some of these are small. Together, they form a portrait. One staged, freshly painted flip generated a report with foundation and joist issues, a bowing wall, missing lintels, temporary roof patching, crumbling chimney crowns, an open gas line, unverified grounding, no arc-fault protection, and moisture in the foundation. Two items couldn’t wait. Several could hurt someone.
None of it was visible to a buyer standing in that beautiful kitchen. All of it was visible to an inspector. A flip is a story told in two languages: the one on the surface, and the one underneath.
That’s the real value of a professional inspection on a flip. The goal isn’t to talk you out of the house. Plenty of flipped rowhouses are worth buying. The goal is to make sure the price matches the house you’re actually getting—finishes and bones. As we always say, the point was never to find a flawless house. It’s to find an honest one, and to give you room to negotiate.
Your Flip-Tour Cheat Sheet
Before you make an offer on a renovated home, walk it with these in mind:
- At the facade: Sight down the walls for bowing or leaning. Check for lintels above openings. Treat painted brick as a question.
- Up top: Ask whether the roof has real flashing or just roofing cement. Check chimney crowns and caps.
- In the basement: Ask what’s behind the finished walls. Look for cracked or notched joists and efflorescence on the foundation.
- At the systems: Open the panel. Look for AFCI protection and a verified ground. Check the water heater for a pan and staining, and inspect line sets and gas terminations.
- In the pretty rooms: Confirm the range is anti-tip secured. Make sure the laundry has room to service it, and that the “new” features actually work safely.
Remember the two things a flip can’t renovate away. The first is a professional set of eyes. The second is the systems a visual inspection can’t reach. For any city rowhouse, we still recommend adding a dedicated sewer scope and radon testing to your package. A shiny renovation tells you nothing about the clay lateral under the sidewalk or the gas seeping up from the soil. (For more on the mindset, see our companion piece, Don’t Let a Flip Become a Different Four-Letter Word.)

ABOUT VALUEGUARD INSPECTIONS
ValueGuard Inspections provides home inspections, sewer scopes, radon testing, and moisture evaluations across Philadelphia, Montgomery, Bucks, Chester, and Delaware counties. Rated 4.9★ by homebuyers — read our reviews on Google. Ready for peace of mind? Schedule your Philadelphia rowhouse inspection at valueguardinspections.com or call (215) 860-3150.
Enjoying our home inspection guides? Get ValueGuard articles in your Google results: